

Been talking about doing this one for a while. So I figured what better way to celebrate the end of our first month and 1000 views than with the great re-heading tutorial!
Get it below!
Okay, so first off why... I personally enjoy the ability to have the Fairies be more flexible with posing and whatnot. That said, you can still enjoy a Fairy leaving the proper head on the proper body, but if you REALLY want to, you can make them super poseable and a little more fun!

What do you need? Well, two figures of course. Mind you, the skin tones do vary slightly so you should do a little product matching before doing this (i.e. Periwinkle has lighter skin than Tink and Fawn, but is good for a re-heading on Vidia or Glimmer). For this, I am using my brand new Neverbeast Fawn and Pirate Fashion Zarina.
Now, don't just go yanking at the heads... You will make the mistake I made the first time and that is destroying the neck joint nub.

Get a coffee cup and fill it up about 3/4 of the way full with hot water. Don't use cold.

Then you are going to want to heat it up in the microwave. 99 seconds is what I use but your microwave may require more or less time. Essentially you want the water super hot but NOT boiling.

As a side note, make sure you take all the stuff out of their hair including the bands and stuff.

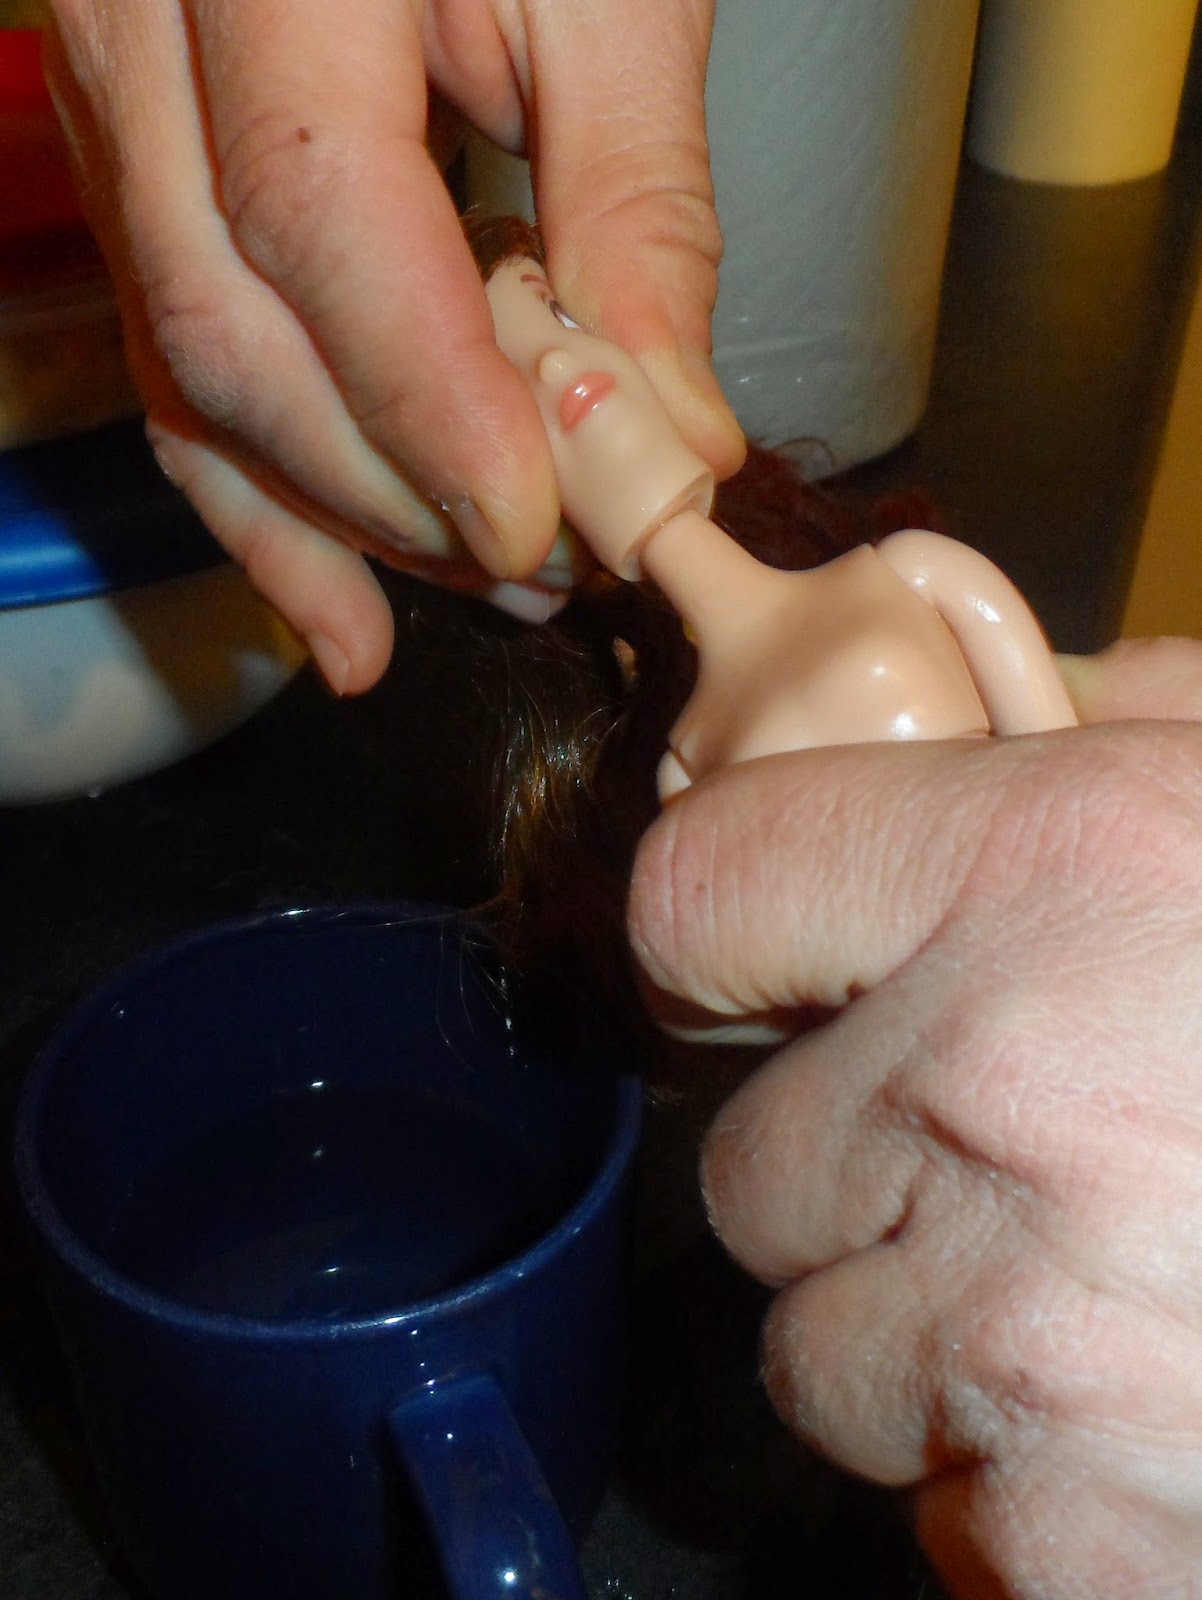
After the head has soaked, remove it from the hot water and grip the head lightly. CAUTION: BE CAREFUL AS THE WATER IS SERIOUSLY HOT!
Your going to want to pull the head up. Proceed slowly and don't force it. You can always soak it a little longer, but with a firm and slow pull you will watch the head pull off the neck and the neck hole will loosely go around the neck nub.


My rule of thumb, soak the poseable body first so that right after removing the "good head" you can put it on the body while it's still soft. Otherwise you will have to re-soak the head.
Sometimes you will have to pinch the head a little to help the neck shape itself around that nub.

Now, while the head is still soft, push it easily onto the new neck. If it is soft enough, it will get squishy and this is okay and a good thing. Don't worry, she won't stay like that.

And here they are... Both with their new bodies. I have a few that I have re-headed onto non-poseable bodies that I will repurpose as customs and a few that I will give to a co-worker for her daughter.

Hope you all enjoyed the tutorial! If you have any questions, post them in the comments below!
Until next time... Faith, Trust and Pixie Dust!